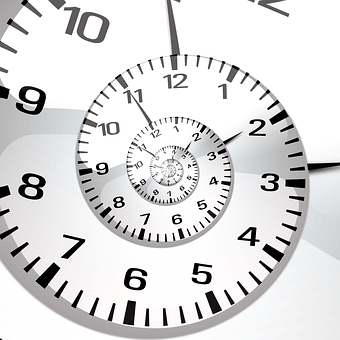
 Over the weekend, I found a cool app for my ipad called Hyperdroste. Droste is a technique which causes smaller images to appear within the original one in a recursive pattern.
The name originated in Holland. Think of a picture repeated within itself. It was named after the chocolate of the same name who first used the effect on a package of its cocoa. The picture showed a nurse holding a tray with a box of Droste's cocoa and cup of cocoa which showed the nurse with a tray holding a box of Droste's cocoa and cup of cocoa, and one and on.
They were the first to use it but if you look around you'll find the effect on record covers, food advertisements, camera ads, etc.
The picture to the left is an example of the effect. The effect is also seen in some of Escher's artwork.
The mathematics for this technique was finally worked out in 2003. Several mathematicians at Leiden University used Escher's Print Gallery drawing to figure out the mathematics involved in this technique because Escher used it a lot. The thing about the Print Gallery creation is that the center has a white space asking people to finish the pattern so these mathematicians did.
Escher apparently took square grids and transposed them onto a curved grid. They discovered the basic technique is first stage uses a transformation of z to log(z) for base e logarithm, the second uses rotation and scaling or rotation dilation, while the third stage uses exponentiation of z to e^z to create the spiral effects. After more checking, they concluded Escher used a scale factor of 18 and a 160 degree rotation for the second step.
It turns out he stumbled across a mathematical concept called Conformal Mapping which is an angle preserving transformation. This concept allows people to transform anything and still get a recognizable image.
Unfortunately, I cannot find any instructions for doing this by hand. I did find a wonderful description of the mathematics used in this process at this site. There are numerous sites with tutorials for using Photoshop, Adobe, and other programs but there are a few sites online that provide free software for students to do this. One is PhotoSpiralysis which works on iPads and allows students to play with images.
I played with this program on my Mac and here are two photos I created using the program.
The first photo above is plain with the effect applied so you see pumpkins within pumpkins, within pumpkins.
The second photo, above, has taken the same photo and spiraled it so it looks more like a nebula.
Check around and you'll find other apps, programs, etc which you can have students use to create these. As always, let me know what you think.


No comments:
Post a Comment